Teacher Onboarding

As a lead teacher you are able to invite other teachers from your school into the software, this then allows for them to utilise the software with their classes. The following step-by-step process should be followed to achieve this: 

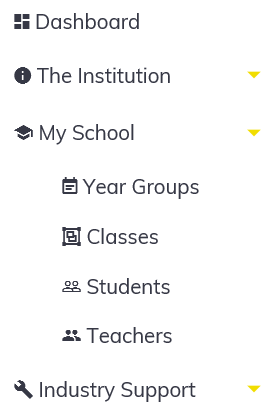
To on-board a new teacher to your school you will first need to navigate to the ‘Teachers’ section, located within the ‘My School’ area of the menu, or click here.

From the ‘Teachers’ section, select the ‘Invite +’ button to progress to the next stage. This will give you the option to invite either a new teacher or lead teacher, the following stages then follow the same process. 

Now it is simply a case of entering the desired teachers email address and submitting the request via the ‘Send invite’ icon. This send them an email with unique registration code and an invite to the software. They should follow the instructions in the email to gain access.

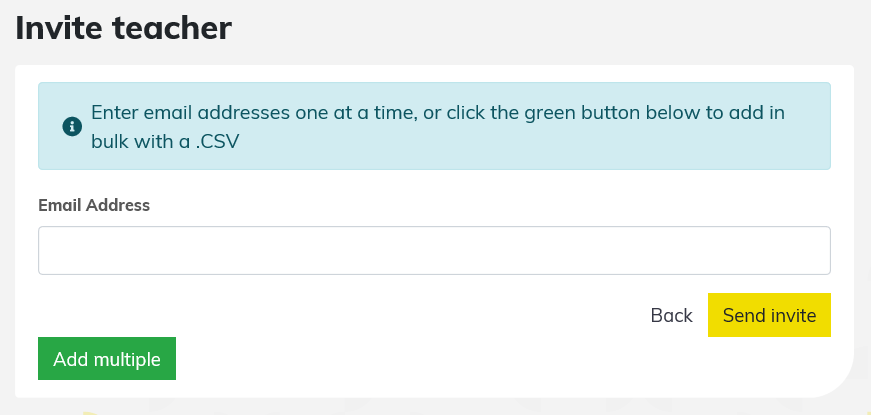
The invite page also allows you to invite multiple teachers into the software at once, a handy feature if you are dealing with numerous colleagues. This is achieved through selecting the ‘Add multiple’ button, highlighted in blue above.

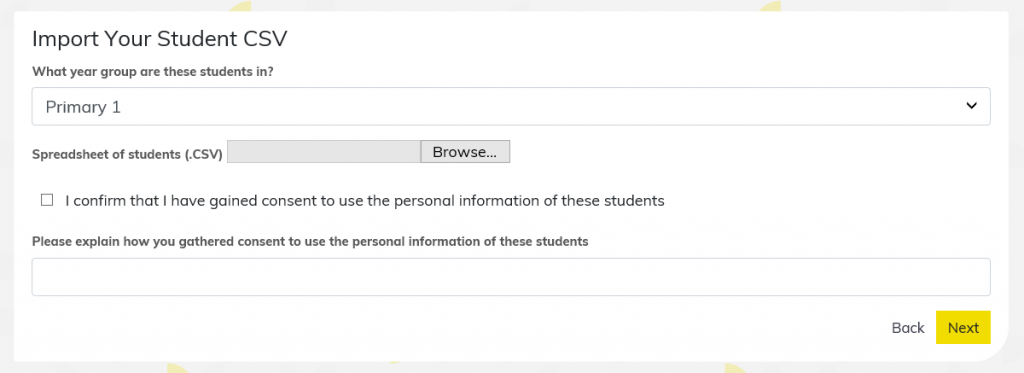
At this point you will need to populate a spreadsheet of your colleague’s email addresses for upload, this sheet should simply be one email address per row. Please click the button below to download an example of the import CSV format. Please do not import this example into your school, it is for your information only! Note: You must save your spreadsheet as a CSV file, other file types will note be accepted for import.

Once you have created your file you can then click the ‘browse…’ button and upload your file to send invites to your colleagues.


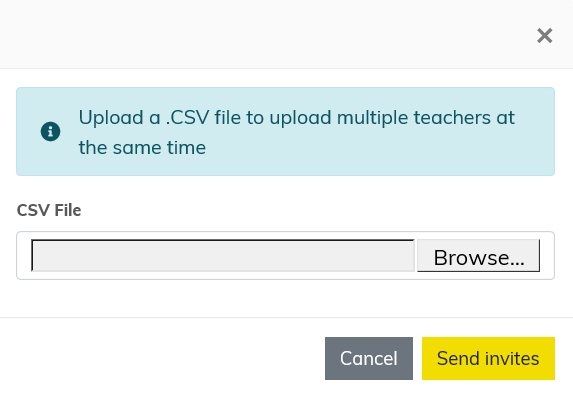
When you are ready to submit, simply select the ‘Send invites’ icon. Once the invites have been sent out to the email addresses in your CSV you will see the message ‘All users successfully invited.’ displayed at the top of the screen.

Creating a New Year Group

Within the current academic year, you must create year groups for classes and their respective students to be added to. Note: If you followed the Academic Year Onboarding process when you first registered you will likely have already completed this step. This guide will instruct you on how to add or amend year groups, outside of this Academic Year Onboarding process. This can be achieved following a few simple steps as follows: 

From the dashboard, navigate to the ‘Year Groups’ page, via the ‘My School’ section of the menu bar, or click here.

You will now find yourself on the ‘Year groups’ overview page, displaying a rundown of the year groups already created.  

To edit the name of an existing year group select the ‘Edit’ button. This allows you to rename the existing year group and update it using the ‘Save’ button. 

To establish a new year group select the ‘Create new’ icon. This allows you to name the new year group and establish it using the ‘Create’ button. You can establish multiple new year groups in one go by following the instructions on screen. 

Creating a New Class

Once a year group has been established, you will be able to create classes within this year by following a few basic steps as follows. You will only be able to create classes for the current academic year. Note: If you followed the Academic Year Onboarding process when you first registered you will likely have already completed this step. This guide will instruct you on how to add or amend classes, outside of this Academic Year Onboarding process.

From the dashboard, navigate to the ‘Classes’ page, via the ‘My School’ section of the menu bar, or click here.

To establish a new classselect the ‘Create new’ button.

You will now find yourself on the ‘New class’ creation page, here you can fill in the fields appropriately. Once happy with the details, select the ‘Create’ button. This action will return you to the ‘Classes’ overview page. 

Student Onboarding

As a teacher you are able to add the details of students from your school into the software, this then allows for their progress and attainment to be directly tracked within the software. The following step-by-step process should be followed to achieve this: 

To add details of a student to your school you will first need to navigate to the Students’ section, located within the ‘My School’ area of the menu, or click here.

From the ‘Students’ section, select the ‘Import’ button to progress to the next stage. 

Now it is simply a case of following the step-by-step instructions shown on the page, allowing you to upload as many pupils as you requireYou must ensure that the CSV file is saved in the format and layout specified, otherwise the software will reject it. You will also require a year group to have been created in advance.

How to Fill in Your Student CSV

Here is an overview of the fields in the CSV and the information you should enter:

  • Unique Identifier – If your school already assigns IDs to students (for example a matriculation number) then please use this. If not you can make these IDs up, but every student within your school must have a unique ID, to ensure that you don’t accidentally create duplicate students! These cannot be changed, after creation, so we strongly advise that you use a matriculation number (or similar) where possible.
  • First Name – Your student’s first name. Letters only please! Hyphens are also OK!
  • Last Name – Your student’s last name. Letters only please! Hyphens are also OK!
  • Gender – Please enter one of only: “Male”, “Female” or “Undisclosed”.
  • Class – The class this student is in; This can be any combination of letters and numbers. Forward slashes are also OK!
  • Class – Additional classes that this student is in; This can be any combination of letters and numbers. Forward slashes are also OK!
    There are multiple column headings for class in case the student is in multiple classes (this will be used more for secondary students). Feel free to add as many class column headings as you need, primary students will likely only have one.

To successfully import a CSV:

  1. Make sure all of the students in your CSV are in the same year group
  2. You must enter information for each student on a new row – one row per student
  3. You must save the file as .csv format (.xls will NOT work)
  4. You must include the column headings in your CSV (stick to the template and you’ll be fine!)
  5. You must enter information under the headings “First Name”

For a template CSV file, with just the column headings, and an example CSV file, with dummy student data, please see the two download buttons at the bottom of this section. Please do not import an dummy data into your school! This CSV is an example for your information only!

Once all fields have been completed, and you have ensured the data you are uploading has gained appropriate permissions, the ‘Next’ button will process you to the next screen.

You will now be given a summary of the class details you submitted via the CSV file. Make sure to check these over and ensure the details are all correct, if not you can use the ‘Back’ link to return, make any necessary changes to your CSV and then re-import. If you are happy with the details, select the ‘Continue’ button – this will return you to the Dashboard having successfully uploaded your students into the software.